
How to install wall panel?
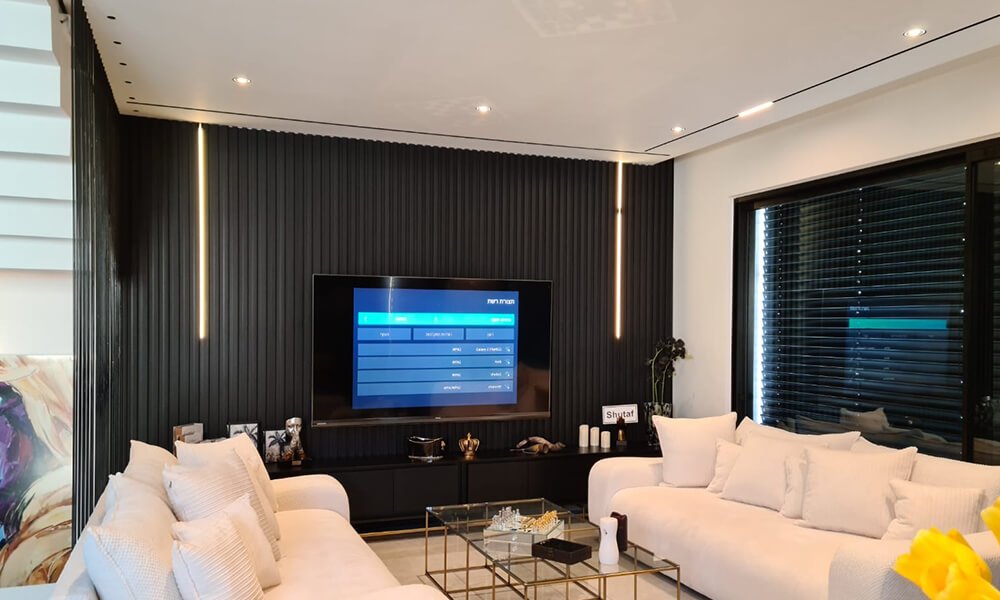
You can have a unique grooved wall panel as the background wall for your photos. Its unique grooved structure design and beautiful surface wallpaper will undoubtedly add unique visual beauty to your photos. Fluted wall panels are not only affordable, very low maintenance, and very easy to install, these features will add more warm colors to your life. Do you also want to install grooved wall panels, but don’t know how to install them? Then I will tell you the specific installation steps step by step. Whether you want to install grooved siding or wood veneer siding, the methods below will work.

Installation tools
Grooved wall panel, corner lines (sold separately), snaps, tape measure or ruler, saw or cutting device, glue gun, level, marker, construction adhesive, glue gun, ladder, etc., all of the above can be used according to According to the actual situation, find a suitable tool to replace it.
Preparation
- Please make sure the wall is flat, clean, dry and dust-free before installation. Keep the surface clear of any hangings, remove all unnecessary wall panels, sockets, moldings, baseboards, etc., and allow the recessed wall panels to remain in the room for 24 to 72 hours to acclimate to the temperature and humidity of the local environment.
- Remove dust from the surface of the wall panel, gently wipe the surface of the wall panel with water and let it dry completely.

Grooved Panel Step-by-Step Installation Guide
1. Measure wall panel length
- How to calculate and purchase the number of wall panels you need is inseparable from accurate measurements. At this time, the accuracy of the data is very important.
- You need to take into account the spacing between wall panels and how it should be installed behind some irregular walls.
- Please reserve 5% loss to prevent upcoming unpredictable damage. Please repeat the measurement to ensure correct results.
2. Mark cutting location
- According to the length of the wall, measure the length of the wall panel, and use a ruler or marker to mark the required wall panel.
- Be sure to ensure the accuracy of the data, otherwise it will cause a waste of wall panels.
- For windows, distribution boxes, power sockets and other places on the wall that need to be cut, please pay attention to retaining

3. Cut wall panels to length as required
- Carefully cut the panel to a length that perfectly fits your wall surface. It should be noted here that ykzwallpanel can customize the length of the wall panel according to your needs. If you need, the wall panel can be cut to a fixed length, so that it will be free of charge. Forget the trouble of cutting or splicing behind you, you can install the wall panels directly after receiving them.
- Please pay attention to leaving a certain gap to allow the material to expand and contract.
When you use the cutting machine, please be sure to wear a mask and gloves to ensure the safety of the operator. - Cutting an opening on the surface of a relatively long wall panel is a test of patience and a challenge to physical strength and endurance. Please be mentally prepared in advance and do not act too hastily.
4. Apply glue to the wall board
- Use a glue gun to apply glue to the back of the wall panel. You can apply glue in dots or in an “S” shape. Just make sure the wall panel can stick to the wall. Too much glue may seep from between the two panels. It will affect the visual effect and cause unnecessary waste of glue.
- If you still feel it is not strong enough at this time, you can use nails to fix the joints of each wall panel, or you can use the buckles we provide to install and fix it to provide additional support for your wall panels.
- If you use buckles, please rest assured that the buckles will be stuck at the joints of the wall panels without any abnormalities visible on the surface. Moreover, the cost of the buckles is very low, and you can choose whether to use them according to your own preferences.

5. Install wall panels
During the installation process, you need to know that the first wall panel plays a very important reference role, and each subsequent wall panel will be installed according to the tone of the first wall panel. The first wall panel is usually at the corner. Before installation, please check whether the wall panel and the wall are consistent enough without glue. Use a level to ensure that the wall panel is installed straight. Then apply glue to install the first wall panel.
When installing wall panels, please pay attention. After installing one wall panel, apply glue to the next wall panel. Do not apply too much wall panel at one time. Because of the liquid characteristics of the glue, if it is applied to the wall panel for a long time, do not use the glue. The pasting effect will also be affected.
After positioning the first piece of wall panel, press the panel firmly into place on the wall to ensure proper adhesion. Use your hands to apply even pressure to the surface. Repeat this process to install additional grooved panels, maintaining the desired spacing between them. Use the first panel as a guide for the remaining panels to make sure they are aligned and level with each other. Continue this process until all panels are installed.

6. Caulking and cleaning
After installation, check all edges and seams for any imperfections and seal and fill gaps with caulk for a clean, neat look. Finally, wipe off excess caulk or adhesive from the surface of the newly installed panels with a damp cloth or sponge, and wipe the surface of the wallboard with a damp cloth to ensure the surface is smooth and clean.
Whether you’re doing a DIY project or working with a professional, installing recessed panels is a fun job that can change the look of a room and add a stylish and elegant feel to the building. Once installed, you have it. The perfect selfie background wall, go and experience it now.